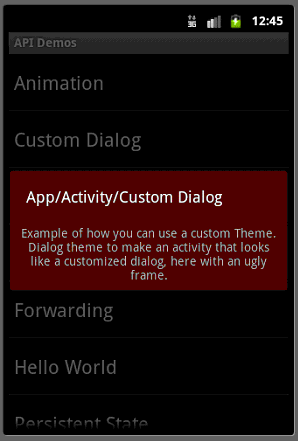
在Android Demo实例App->Activity->Custom Dialog中,使用Activity来实现自定义对话框,类CustomDialogActivity本身无任何特别之处。关键的一点是其在AndroidManifest.xml中的定义:
XML/HTML代码
- <activity android:name=”.app.CustomDialogActivity”
- android:label=”@string/activity_custom_dialog”
- android:theme=”@style/Theme.CustomDialog“>
- <intent-filter>
- <action android:name=”android.intent.action.MAIN” />
- <category android:name=”android.intent.category.SAMPLE_CODE” />
- </intent-filter>
- </activity>
CustomDialogActivity使用了CustomDialog 风格(Theme)。
Android应用可以使用自定义的界面风格(Theme),Theme 为一组相关的Style定义,可以应用于某个Activity或是整个Application。使用Theme的一个好处是可以为整个应用定义统一的界面风格(统一的背景色,字体等)。
定义Theme 和定义Style一样, 必须定义在/res/values子目录下,根元素名为resources,Theme 和Style的区别在于,Theme应用于Activity和Application, 而Style应用于单个的View。 其定义方法是一致的。Style 定义支持 Inheritance,也就是在定义新风格时可以基于系统定义的风格或是之前定义的风格:
如Theme.CustomDialog 定义就是基于Android的Dialog风格(parent)而只修改的WindowsBackground属性,使用了褐色背景。
XML/HTML代码
- <style name=”Theme.CustomDialog” parent=”android:style/Theme.Dialog”>
- <item name=”android:windowBackground”>@drawable/filled_box</item>
- </style>
