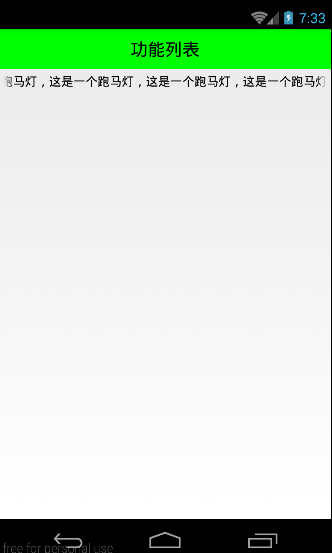
本文将实现标题栏下面的textview中的文字跑马灯的效果,就是将一行文字水平循环滚动,效果如下:

实现代码如下:
- <!-- android:ellipsize="end"添加省略点的所在位置 -->
- <!-- 想让文字出现跑马灯效果,必须让其获取焦点 -->
- <!-- android:marqueeRepeatLimit="marquee_forever"一直滚动属性 -->
- <!-- 自定义控件达到滚动效果(其实就是重新原有的TextView,让其一直能够获取焦点即可) -->
- <TextView
- android:text="这是一个跑马灯,这是一个跑马灯,这是一个跑马灯,这是一个跑马灯,这是一个跑马灯,"
- android:layout_width="match_parent"
- android:layout_height="wrap_content"
- android:ellipsize="marquee"
- android:focusable="true"
- android:focusableInTouchMode="true"
- android:marqueeRepeatLimit="marquee_forever"
- android:padding="5dp"
- android:textColor="#000"
- android:singleLine="true"
- />
如果其他地方也需要这样的跑马灯效果,复制代码比较麻烦。这里使用自定义控件来实现滚动效果(其实就是重新原有的TextView,让其一直能够获取焦点即可)
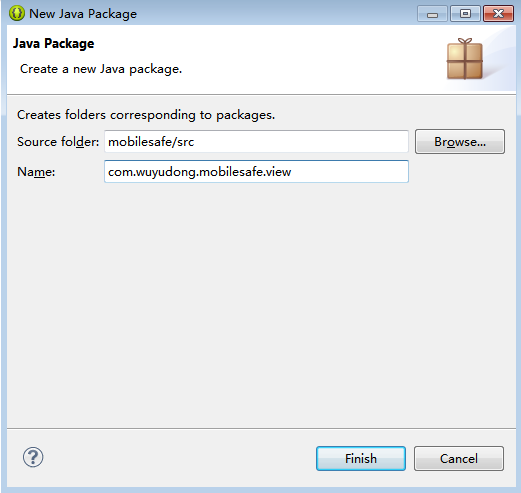
新建一个包view,专门放自定义控件文件

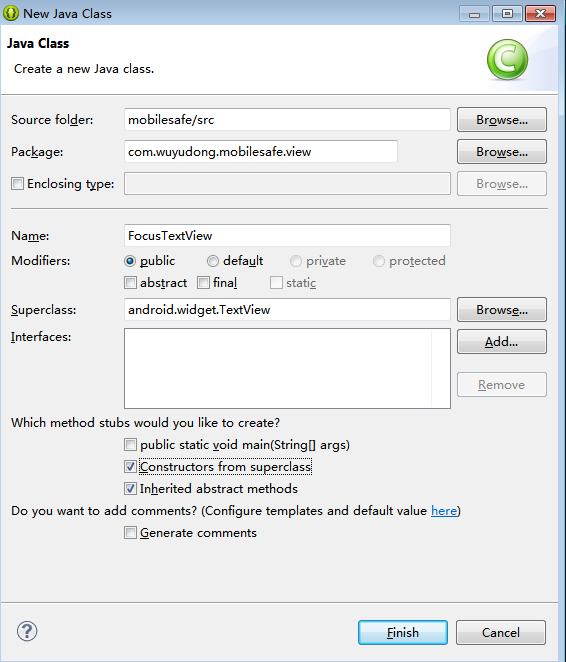
新建FocusTextView类

添加代码:
- package com.wuyudong.mobilesafe.view;
- import android.content.Context;
- import android.util.AttributeSet;
- import android.widget.TextView;
- /**
- * @author wuyudong
- * 能够获取焦点的自定义TextView
- *
- */
- public class FocusTextView extends TextView {
- // 使用在通过java代码创建控件
- public FocusTextView(Context context) {
- super(context);
- }
- // 由系统调用(带属性+上下文环境构造方法)
- public FocusTextView(Context context, AttributeSet attrs) {
- super(context, attrs);
- }
- // 由系统调用(带属性+上下文环境构造方法+布局文件中定义样式文件构造方法)
- public FocusTextView(Context context, AttributeSet attrs, int defStyle) {
- super(context, attrs, defStyle);
- }
- // 重写获取焦点的方法
- @Override
- public boolean isFocused() {
- // return super.isFocused();
- return true;
- }
- }
布局代码替换为:
- <?xml version="1.0" encoding="utf-8"?>
- <LinearLayout xmlns:android="http://schemas.android.com/apk/res/android"
- android:layout_width="match_parent"
- android:layout_height="match_parent"
- android:orientation="vertical" >
- <TextView
- style="@style/TitleStyle"
- android:text="功能列表" />
- <!-- android:ellipsize="end"添加省略点的所在位置 -->
- <!-- 想让文字出现跑马灯效果,必须让其获取焦点 -->
- <!-- android:marqueeRepeatLimit="marquee_forever"一直滚动属性 -->
- <!-- 自定义控件达到滚动效果(其实就是重新原有的TextView,让其一直能够获取焦点即可) -->
- <!--
- <TextView
- android:text="这是一个跑马灯,这是一个跑马灯,这是一个跑马灯,这是一个跑马灯,这是一个跑马灯,"
- android:layout_width="match_parent"
- android:layout_height="wrap_content"
- android:ellipsize="marquee"
- android:focusable="true"
- android:focusableInTouchMode="true"
- android:marqueeRepeatLimit="marquee_forever"
- android:padding="5dp"
- android:textColor="#000"
- android:singleLine="true"/> -->
- <com.wuyudong.mobilesafe.view.FocusTextView
- android:text="这是一个跑马灯,这是一个跑马灯,这是一个跑马灯,这是一个跑马灯,这是一个跑马灯,"
- android:layout_width="match_parent"
- android:layout_height="wrap_content"
- android:ellipsize="marquee"
- android:marqueeRepeatLimit="marquee_forever"
- android:padding="5dp"
- android:textColor="#000"
- android:singleLine="true">
- </com.wuyudong.mobilesafe.view.FocusTextView>
- </LinearLayout>
总结一下自定义控件
自定义控件编写流程
创建一个默认就能获取焦点的TextView
1、创建一个类继承至TextView,FocusTextView
2、重写其构造方法
- public class FocusTextView extends TextView {
- // 使用在通过java代码创建控件
- public FocusTextView(Context context) {
- super(context);
- }
- // 由系统调用(带属性+上下文环境构造方法)
- public FocusTextView(Context context, AttributeSet attrs) {
- super(context, attrs);
- }
- // 由系统调用(带属性+上下文环境构造方法+布局文件中定义样式文件构造方法)
- public FocusTextView(Context context, AttributeSet attrs, int defStyle) {
- super(context, attrs, defStyle);
- }
- // 重写获取焦点的方法
- @Override
- public boolean isFocused() {
- // return super.isFocused();
- return true;
- }
- }
3、将原有TextView上的isFocus方法默认修改为,能够获取焦点
- // 重写获取焦点的方法
- @Override
- public boolean isFocused() {
- // return super.isFocused();
- return true;
- }
4.使用过程
获取当前类的全路径名称,作为xml中的标签存在,其余属性的使用方式和TextView一致


发表评论:
◎欢迎参与讨论,请在这里发表您的看法、交流您的观点。